KEY TAKEAWAYS
- A hangar planned around aircraft dimensions, taxi movement, and storage habits supports safer towing and predictable routines.
- Location, soils, wind, and snow loads shape foundational engineering and door performance on rural properties.
- Clear spans, proper equipment doors, balanced lighting, and ventilation all contribute to smoother maintenance and winter usability.
- Correct foundations, post sizing, bracing, and uplift protection support long-term durability and dependable value.
- A coordinated process through zoning, engineering, site preparation, and sequencing creates steady progress from design to first flight.
A well-planned aircraft hangar makes every flight day easier. It protects the airframe, keeps tools and gear organized, and turns towing and parking into simple, predictable habits. For rural owners across Canada, the goal is the same: a hangar that fits your aircraft, your land, and the routine you use around it.
Good planning starts with practical decisions — where the hangar sits, how the taxi path lines up, how the door opens, and how the structure handles rural weather. This guide focuses on aircraft hangars for small aircraft—from single and twin pistons, turboprops, and light helicopters, with clear explanations and examples that help you choose confidently without the noise or complexity.
“A well-planned aircraft hangar is more than shelter, it supports how you handle, maintain, and store your aircraft.”
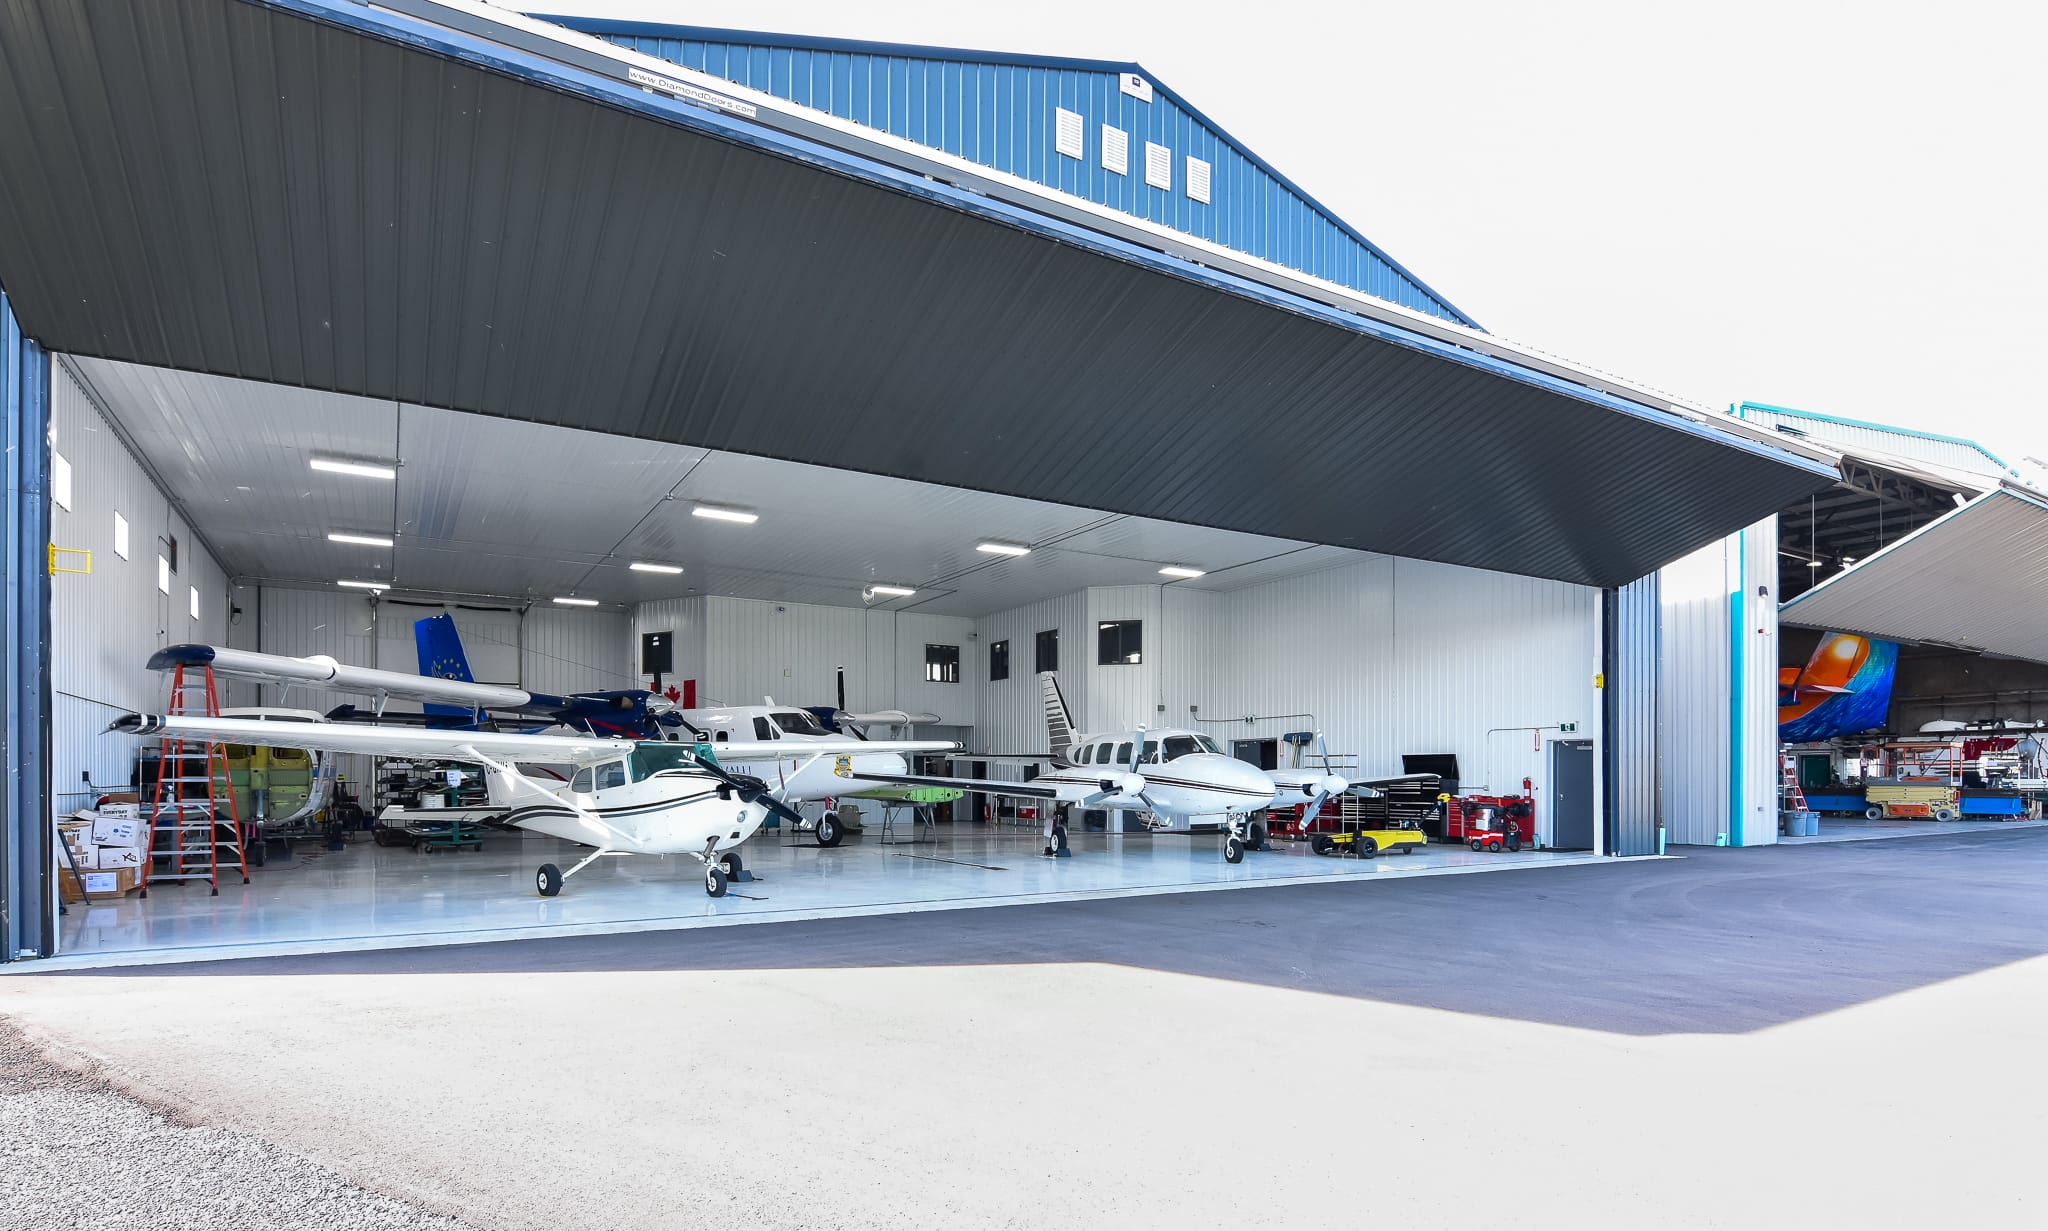
Understanding What a Well-Planned Aircraft Hangar Really Provides
A well-planned aircraft hangar is a space that supports how you handle, maintain, and store your aircraft. When clearances, doors, and interior organization match your routine, you move with less risk, less tug time, and fewer concerns around wingtips and props. That predictability protects the aircraft and saves time on every arrival and departure.
For most rural owners, the essentials are straightforward:
- A door opening that matches wingspan and tail height
- A clean taxi path with good visibility
- Reliable ventilation and humidity control
- A slab that’s easy to maintain and resists fluids
With those fundamentals in place, storage becomes intuitive instead of improvised. Skis, covers, ladders, tie-downs, and tools all have a place that stays out of the way of the main bay. Interior metal cladding speeds cleanup, insulation tamps down winter cold and summer heat, so your work isn’t scheduled by the weather, and good sightlines help avoid dings and close calls. A thoughtful layout makes the hangar feel larger and easier to work in, no matter its footprint.
How Building Location & Site Conditions Shape Aircraft Hangar Design
A hangar that fits your land will feel safer to use, easier to maintain, and support smoother routines. The site sets the boundaries for layout, structure, and access, so early clarity helps every other decision fall into place. Good planning considers how you access the hangar, how much effort is required to prep the building pad, and how snow and wind loads shape the building design.
Access, Apron & Taxi Path
Smooth aircraft movement is one of the best safety features you can plan for. A straight taxi line to the equipment door reduces tug turns and keeps wingtips away from fences, vehicles, and surrounding obstacles. A dedicated apron in front of the hangar prevents ruts and winter berms from blocking the door. Gravel shoulders and geotextile underlay protect the approach when spring thaw softens the surface.
Wingtip radius, tow bar length, and rotor diameter matter when choosing setbacks from trees and other buildings. A layout that avoids backing or tight pivots keeps ground handling predictable. Lighting around the apron and door should mark edges without glare. Clear markings also help visitors avoid driving across the taxi path at night.
Soil, Frost, Foundations & Drainage
Soils influence the foundation choices of how posts are set below grade and ultimately influence cost and longevity. Basic post frame hangars place wooden posts directly in the ground, with treated lumber in contact with the soil. Builders will offer upgraded options such as plastic sleeves over in-ground portions of posts, or concrete and steel piers that keep wood out of the ground. Regional frost depths determine how deep posts will be set to resist heave during freeze and thaw.
Eavestroughs and downspouts carry meltwater away from posts and slab edges to protect the apron through freeze and thaw cycles and reduce ice build-up on taxi routes. Directing water away from the building also prevents water from collecting against posts and foundations.
Wind, Snow & Weather Loads
Weather heavily shapes hangar design. Snow loads influence truss sizing and spacing, while wind exposure affects wall bracing, fastening patterns, and door reinforcement. Heavy drifting in front of the equipment door calls for thoughtful orientation and careful door selection.
Bi-fold and sliding doors react differently under strong winds and drifting, so the frame must be engineered for the specific door you select. Door seals also support humidity control by blocking drafts that cause condensation on cold surfaces.
Utilities & Services
Reliable power, water, and heat support safe, comfortable maintenance and preflight routines. Utility entrances work best on walls with minimal obstructions and away from the equipment door. Water service supports wash bays, hand wash stations, and winter preheat needs. If you store fuel, place tanks outside and downwind. Planning conduits for future generator or solar hookups is far easier during groundwork than after concrete cures.
Planning service routes early sets expectations for costs to tie the hangar into power and water, and helps direct initial site selection.
Setbacks, Easements & Neighbours
Rural municipalities set setbacks from roads, property lines, and watercourses that apply to aircraft hangars. Utility easements can influence where posts, doors, and driveways can be placed. Noise and prop wash carry farther across open land, so placing the apron away from nearby houses helps maintain privacy and goodwill. Near registered rural aerodromes, height surfaces may limit hangar height, so tail clearance choices should be confirmed early.
Survey pins and GPS stakes make layout clear for everyone. At small rural airports, a layout that respects existing hangars and traffic patterns meets daily restrictions. On private airstrips, consider how a new hangar will impact everyday use of your property.
When access, soils, and weather loads are understood early, structural and design decisions become simpler. This avoids compromises or unexpected costs that show up after the slab is poured and supports a hangar that performs well from the first taxi.
Key Layout & Size Choices for Small Aircraft Hangar Owners
A hangar planned around your aircraft dimensions and routine will feel safer and easier to use. When the layout, door, and interior features work together, towing is straightforward, wingtips stay clear of clutter, and the bay remains open instead of crowded.
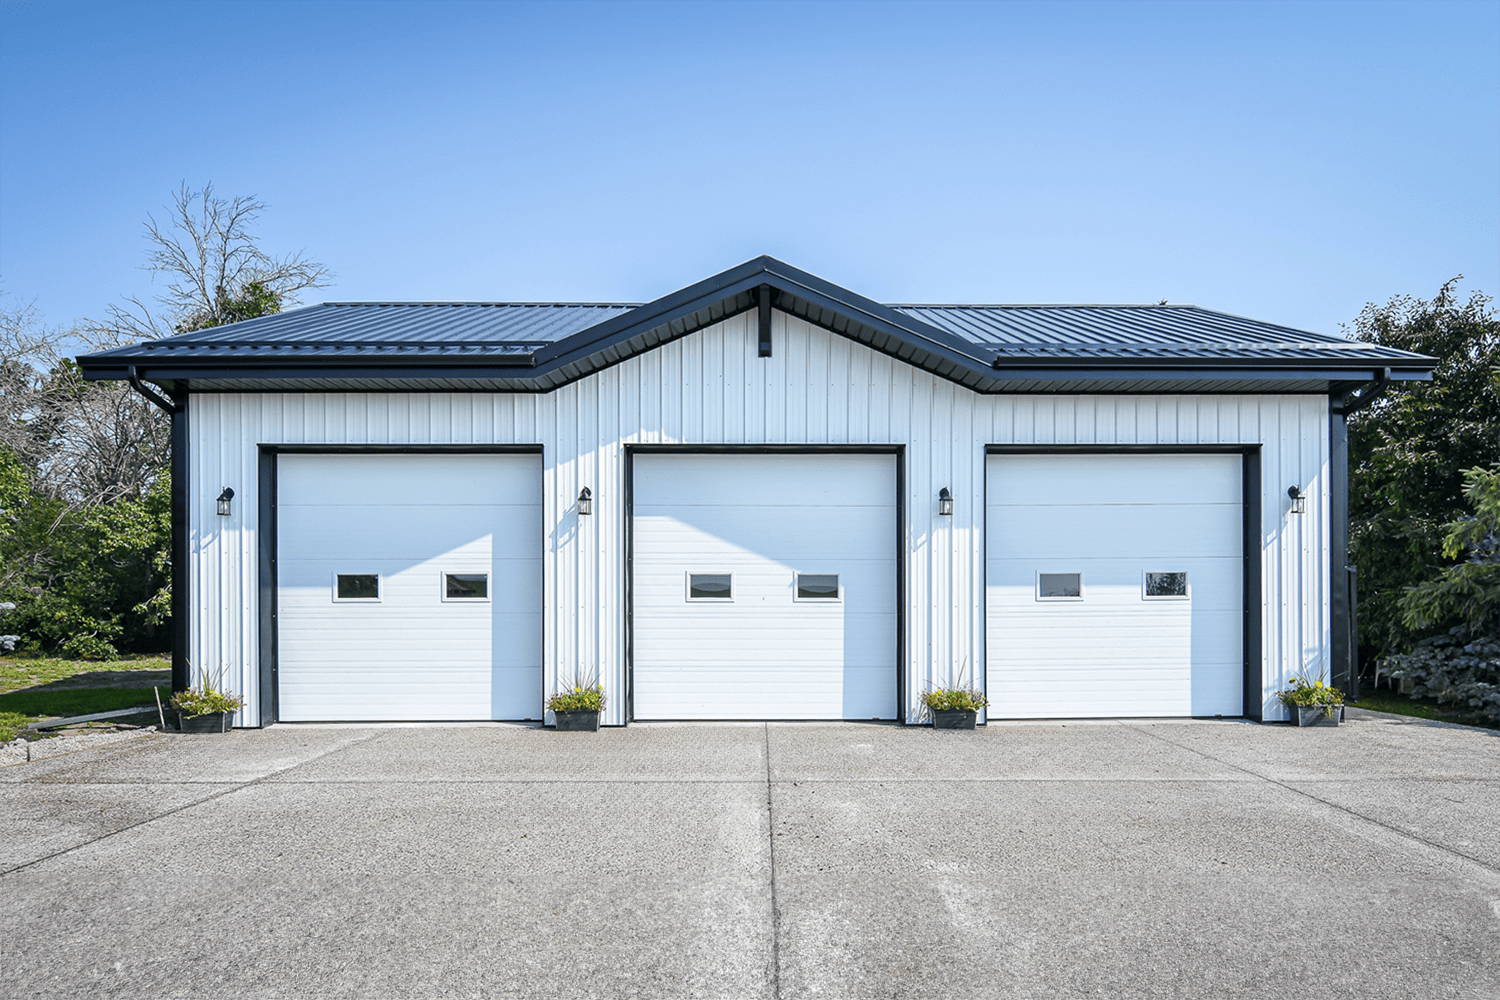
Equipment Door Opening & Door Type
The equipment door sets the width and height of the hangar. Choose an opening that gives you confident clearance at the wingtips and tail so you never need to angle the aircraft to fit inside. Bi-fold and sliding doors both work well on rural properties. Bi-fold doors offer generous headroom near the centreline, while sliding doors keep hardware simple and serviceable.
Selecting the door early allows the structure to be engineered for the exact load and header height required. This supports smooth operation through winter and consistent alignment over the life of the hangar.
Ceiling Height & Tail Clearance
Tail height determines the truss height at the centreline. Give yourself a margin above antennas and beacons to avoid slow, cautious taxi entries. Extra height also supports lighting, heaters, and a small mezzanine at the sides without affecting the taxi path.
Circulation & Storage Zones
Hangars feel larger when the floor plan is divided into simple, intentional zones. Reserve the centre for towing and parking, then set aside the sides for benches, tools, skis, covers, and spares. Painted lines, low curbs, or short demising walls help avoid accidental wingtip contact with stored items. A small mezzanine above a bench or office can keep seasonal gear out of the main bay and elevated from floor space.
For rural hangars that are used commercially, the hangar can be designed as a hub for business operations by including offices, plus lunch and meeting rooms for staff.
Lighting & Ventilation
Even, bright lighting supports towing, inspections, and winter maintenance. Aim for consistent coverage across the bay with higher levels at work areas. Translucent panels or windows can add daylight without glare.
Ventilation protects the aircraft and supports safe maintenance by clearing humidity and fumes. Exhaust fans paired with intake air help maintain good airflow during warm-up checks or after maintenance. A balanced ventilation approach also reduces condensation on weather-sensitive parts like metal skins and tools.
Wash Zones & Drains
If you plan to wash or maintain the aircraft inside, a drain system with correct slopes keeps the slab clear of pooling water. Trench or pit drains must be planned early so engineering and concrete layout align. Good drainage reduces slip hazards and makes cleanup easier.
Size That Fits Your Aircraft
Your primary aircraft determines the footprint. Start with wingspan, door width, tail height, and tug clearances. Size the hangar for the aircraft you fly often rather than the largest one that might visit on occasion. A balanced, open plan will pay off every time you roll in or out.
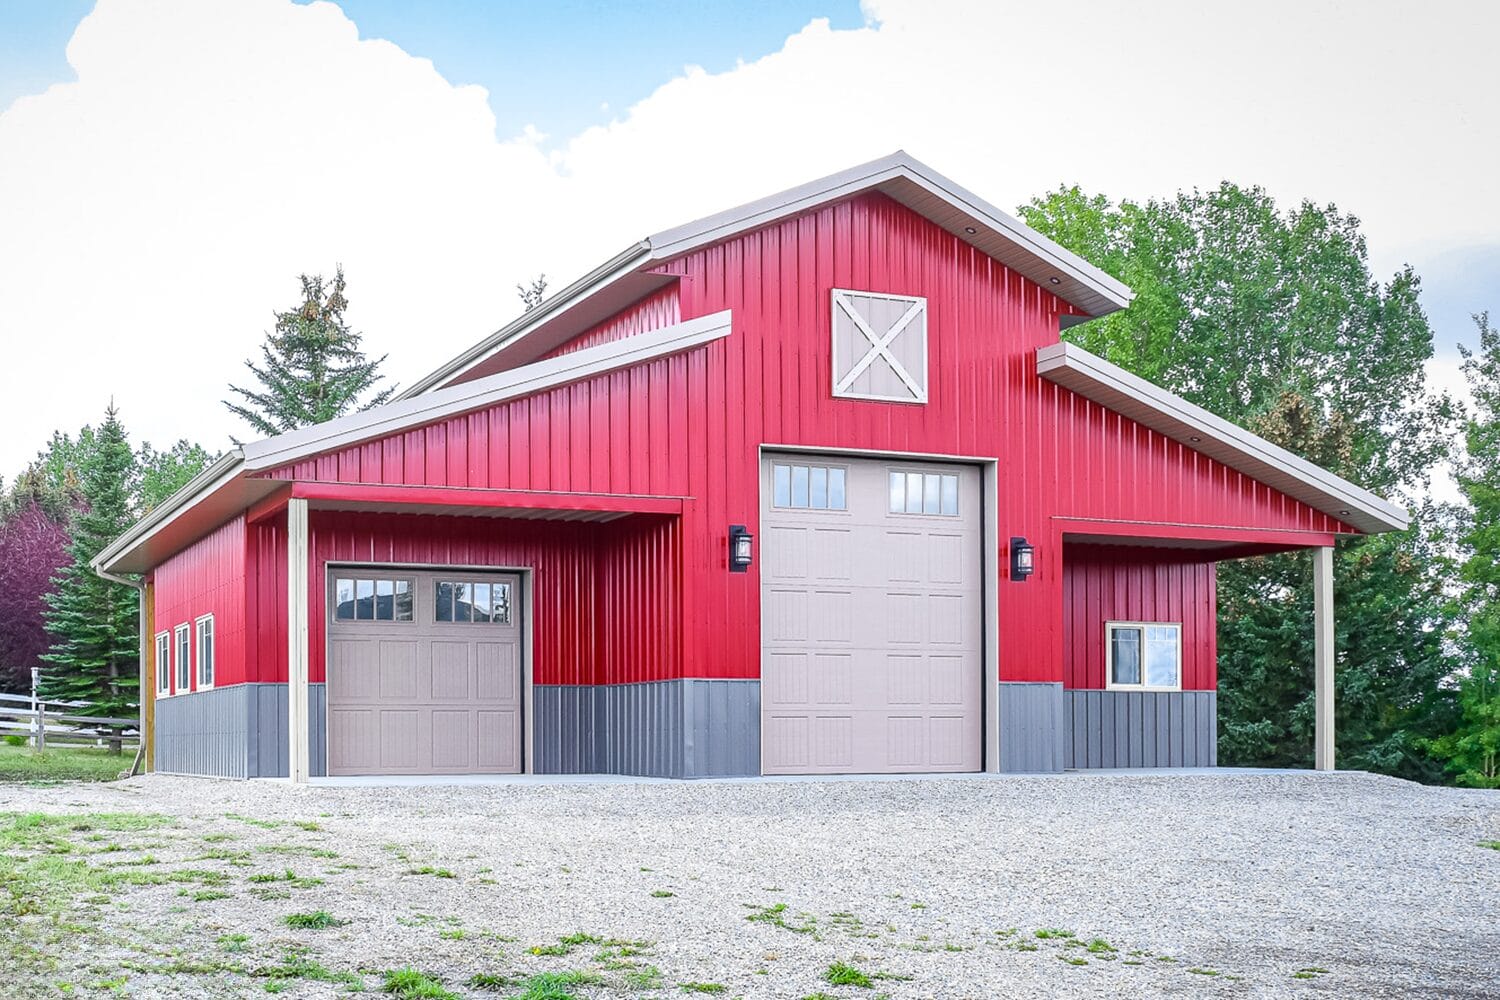
Comparing Aircraft Hangar Construction Options for Rural Properties
The main difference between post frame and pre-engineered metal construction is how each system manages clear spans, foundations, and long-term upkeep. Post frame uses embedded posts and engineered trusses to create wide, open bays with efficient site preparation and flexible layouts that suit rural airstrips. Steel frame buildings rely on heavy members anchored to a slab, and they are often selected for very wide openings or heavier door assemblies.
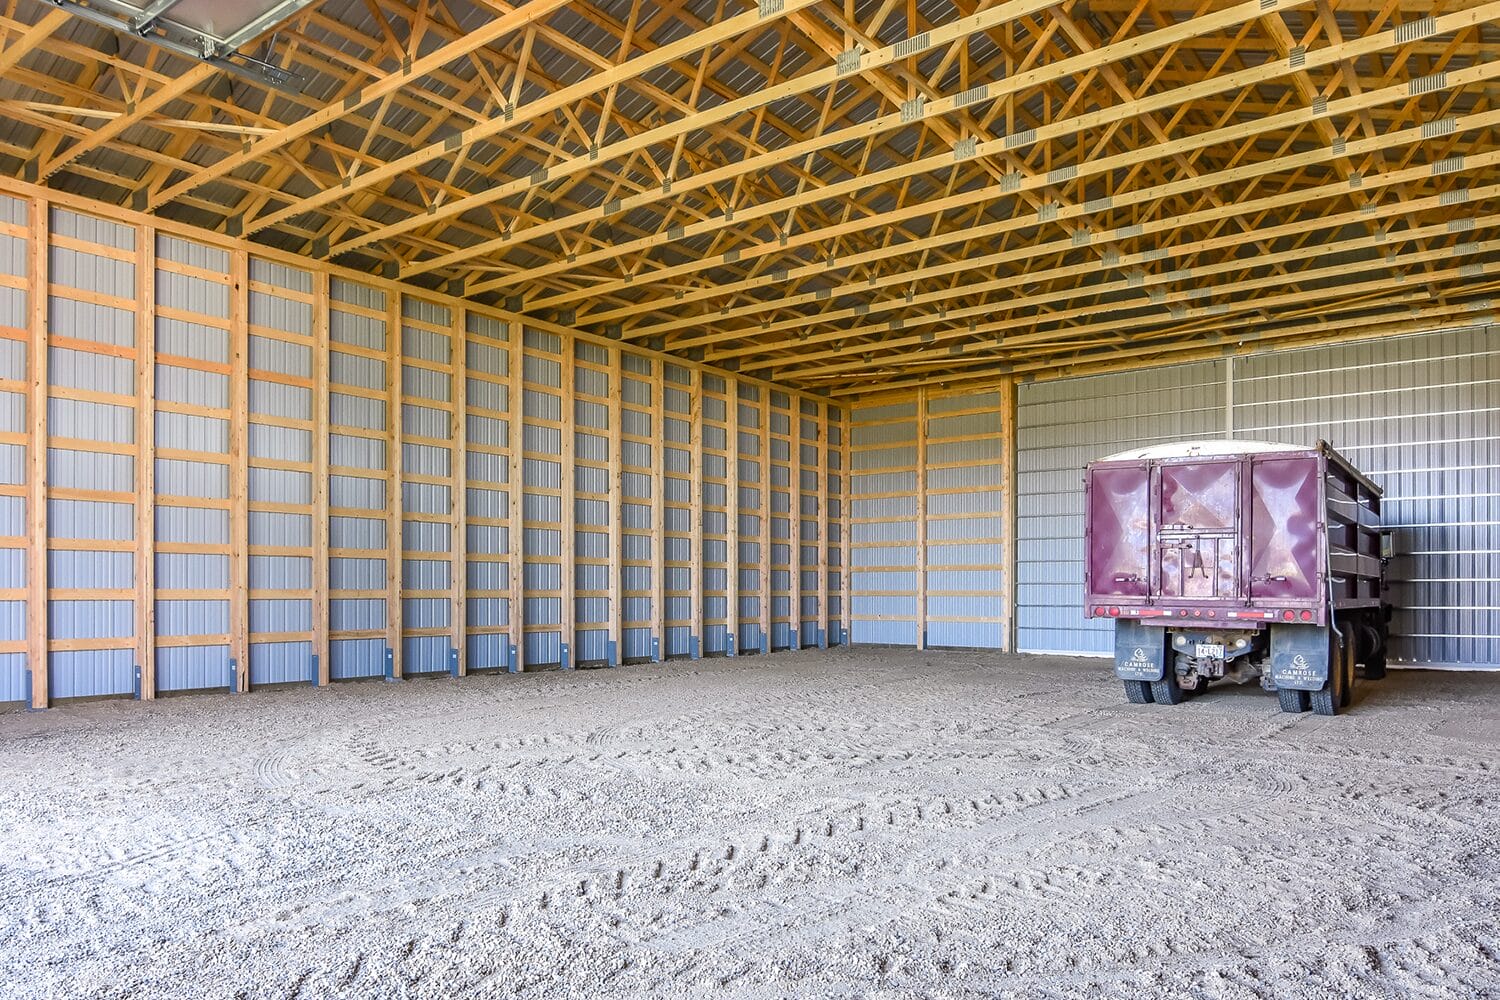
Post Frame
Post frame structures uses embedded wood posts that bear the weight of engineered trusses and the roof system to create wide clear spans that suit single and twin pistons, turboprops, and light helicopters. Bi-fold or sliding equipment doors are supported when framed with the correct headers and bracing. Interior metal cladding, building wrap, and insulation work well together to manage humidity and make cleanup straightforward.
Post frame is popular on rural properties because the site work is efficient, layouts are flexible, and the structure handles wind and snow loads with confidence. Good drainage and careful detailing at posts support long-term durability.
Steel Frame
A steel frame building anchors steel columns to a slab-on-grade foundation. These systems deliver large clear spans and are common at airports with higher traffic, or for hangars with exceptionally long clear span requirements. They support bi-fold and overhead doors but rely on precise slab preparation and anchor placement. Insulation and condensation control vary by system, so the envelope must be planned carefully. Steel options work well for wide openings and heavy door assemblies. They often involve specialty erection crews and require more coordination around concrete timing and longer build timelines.
| System | Foundation approach | Typical clear span | Interior finish & insulation | Notes |
| Post frame | Wooden posts embedded below grade | Wide spans for small aircraft | Straightforward insulation, interior metal cladding cleans well | Efficient site work, flexible layouts |
| Steel frame | Slab-on-grade with anchor bolts | Very wide spans | System-specific insulation, verify condensation control | Strong option for wider openings |
What to Know About Aircraft Hangar Kits & Material Choices
Some rural aircraft owners look at aircraft hangar kits to manage timing or involve family and local trades in the build. A kit can work in specific situations, but most owners prefer a complete build from a dedicated hangar builder because the structure, door engineering, and sequencing are handled as one coordinated process. A builder can customize your hangar to unique uses, where kits often follow a one-size-fits-all approach.
If you are considering a kit, the most important factor is clarity on what is included. Some packages supply only the structural members and cladding, while others add fasteners or basic hardware. Equipment doors are often sourced separately, and door engineering must match the exact opening and local wind and snow loads. Stamped drawings and installation guidance are essential for permits and inspections, and you should confirm who supports revisions if site conditions change.
Structural Members
A post frame hangar relies on laminated posts, engineered trusses, and dimensional lumber for purlins and girts to create the shell of the build, which are all commonly included in a kit. Hardware such as brackets and anchors affects how the hangar handles door loads during winter storms. If the kit substitutes lighter components to reduce shipping costs, confirm that the engineering still meets your region’s loads.
Cladding & Exterior Finish
Exterior metal cladding should be chosen for dent resistance, long paint life, and the correct profile for your weather conditions. A 29-gauge panel with higher tensile strength can outperform a lower tensile option at a thicker gauge, which is why specifications matter. Trim, and colour choices shape the look of the hangar and help manage heat gain and snow melt patterns. Building wrap behind the cladding improves air tightness for heated hangars.
Insulation & Condensation Control
Insulation and moisture control are planned as a system. A hangar that stays above freezing will benefit from targeted insulation, air sealing, vapour barriers, and good ventilation. Interior metal cladding helps with cleanup and protects insulation.
Equipment Doors & Hardware
The equipment door is the most stressed component in any hangar. Bi-fold and sliding doors both work well for rural hangars, but the frame must be engineered for the exact door you select. Door seals, sill details, and clear tracks support safe winter use and reduce drafts. If a kit includes only a basic sliding door, confirm that it suits your aircraft and site exposure.
Support, Delivery & Hidden Costs
Permits, inspections, utility coordination, and service access still apply to DIY projects. Delivery timelines, equipment rental for installation, and freight can add costs that are not always obvious at first. Local trades for concrete, electrical, and door servicing should be lined up long before materials arrive.
Kits can suit owners who have time, tools, and trusted local trades. Most rural aircraft owners choose a complete build because the engineering, doors, structural details, and sequencing come together smoothly as one personalized project.
Essential Safety & Workflow Considerations in Airplane Hangar Planning
A hangar that supports safe routines reduces stress on every flight day. Small choices in layout, storage, and equipment placement shape how you move around the aircraft and how predictable your ground handling feels. When the space is organized around your habits, you avoid rushed decisions and protect the aircraft from avoidable risks.
- Clear Tow Paths: A straight, obvious path from the equipment door to the parking position protects wingtips and reduces the chances of clipping ladders, benches, or stored gear. Painted lines or low-profile stops help maintain a consistent tow line, especially when visibility drops in winter.
- Safe Exits: Doors placed at opposite corners give you two clean exits in case of an emergency. Keeping snow cleared away from these doors is important so you always have a safe path out of the hangar.
- Fuel Handling: Storing fuel outside or in rated cabinets keeps vapours away from maintenance areas. Bonding points, visible fire extinguishers, and a consistent refuelling routine support safer handling during winter preheat or after dark.
- Separating Work Areas: A small demising wall or painted zone for benches and parts helps keep clutter away from wingtips. This also creates a natural flow when you tow the aircraft in and out, and it keeps tools organised for routine checks.
- Electrical Planning: Ceiling cord reels, outlets near benches, and GFCI protection where wash water is present make daily tasks easier. Good placement also reduces tripping hazards and keeps cords away from tow paths.
- Ventilation Strategy: Ventilation supports comfort and protects the aircraft by controlling humidity and fumes. Exhaust fans paired with fresh air intake help clear the space during run-up checks or after maintenance. Proper ventilation also supports condensation control in winter, which matters for avionics and tools.
- Winter Slip Control: A broom finish on the slab, well-placed mats at entries, and eavestroughs with downspouts that direct meltwater away from the apron all help prevent ice buildup. These measures make walking and towing safer throughout the season.
When safety and workflow are built into the layout from the start, the hangar feels intuitive to use. You move with confidence, and family members or visitors pick up the routine without reminders. That sense of order pays off every time you park or pull the aircraft out for a flight.
How to Prepare for Permitting, Engineering & Build Timelines
Clear information and steady coordination keep an aircraft hangar project moving. Each municipality has its own zoning and permit rules, and hangars introduce unique considerations such as height limits, apron placement, and equipment door loads. When the early steps are handled with care, the rest of the build follows a predictable path.
Municipal Zoning & Aerodrome Considerations
Start by confirming how the property is zoned and what the municipality allows for height, setbacks, and access. In some areas near aerodromes, height surfaces apply and influence roof pitch and tail clearance. If your hangar will include a wash bay or fuel storage, ask about occupancy rules and fire separations so these details are reflected in the drawings.
Some rural parcels include development terms that affect drainage or access. A surveyed site plan with proposed grades and drainage routes helps reviewers understand how runoff will be managed. Discussing snow removal or apron traffic with neighbours can reduce concerns and make inspection visits smoother.
Engineering Documents & Stamped Drawings
Engineering provides the structure for local wind and snow loads, soil conditions, and the equipment door you select. Truss spacing, post size, bracing, and uplift protection all depend on accurate information about the site and door system. If an office, mezzanine, or wash zone is planned, these loads and separations must appear in the drawings.
Stamped drawings from a licensed professional are standard for aircraft hangars. They support permit approval, insurance requirements, and clean communication with trades. Grouping revisions into clear batches helps control fees and ensures crews work from the correct set.
Utility Coordination & Site Surveys
Book utility locates and capacity checks early so conduit paths and service entrances can be planned before excavation. A topographic survey captures slope, trees, and structures that influence taxi lines, drainage, and building placement. Plan man doors and service panels where snow removal and apron traffic will not block access.
If water, septic, or data services are included, confirm separation distances and run conduit under the slab where needed. Planning these pathways before concrete avoids costly core drilling later.
Procurement & Seasonal Scheduling
Lead times for equipment doors, trusses, and insulation shift through the year. Ordering key components early helps avoid delays. On the Prairies, groundwork and posts often start once frost is gone, followed by framing, cladding, and equipment doors. Winter construction is a viable option for many and offers some benefits over spring or summer builds.
Crews work efficiently when deliveries arrive in the order they are installed. Keeping cladding, wrap, and fasteners covered and off the ground protects quality during construction.
Groundwork, Foundations & Slab Sequencing
Pad preparation and excavation establish the elevation and orientation for the hangar. Building pads must be level and aligned so the equipment door header remains true. Once posts and trusses are set and braced, building wrap and exterior cladding follow. Concrete pouring for slabs and aprons typically takes place after the structure is fully completed to ensure smooth sequencing of trades.
Floor drains and slopes should be planned before drawings head to engineering so trench locations do not conflict with posts. Interior cladding, insulation, and final mechanical work proceed after the slab reaches strength. Door seals and hardware adjustments complete the building before handover.
“Experience shapes the details that make a hangar reliable and comfortable to use.”
Why Working With Experienced Aircraft Hangar Builders Matters
Experience shapes the details that make a hangar reliable and comfortable to use. A builder who understands aircraft movement, snow loads, and rural sites will ask practical questions about how you tow, where you park support vehicles, and which winter conditions have caused problems for you in the past. Those answers guide structural decisions, drainage patterns, and door reinforcement that hold up through Canadian winters.
Quality control is visible at every stage. Straight posts, aligned trusses, and cleanly installed cladding protect the building envelope and help the equipment door operate smoothly through temperature swings. Drainage, apron grading, and man door placement are planned to match the way you use the property.
An experienced crew also manages the sequence with care. Clear expectations around weather, inspections, and concrete timing keep the project steady. Good communication lets you follow progress without feeling rushed or left in the dark. Choosing a builder who brings this level of attention results in a hangar that is easier to maintain and more predictable to operate. It provides decades of value by supporting safe movement, controlling humidity, and standing up to the conditions your aircraft sees every season.
Building Confidence With Remuda’s Custom Aircraft Hangar Solutions
Rural aircraft owners want a hangar builder who listens, visits the property, and designs for the way they actually tow, park, and maintain their aircraft. Remuda Building begins with a site visit to understand your taxi path, apron needs, and aircraft dimensions. That information guides size, door selection, foundation type, and any storage or workspace zones you want inside the hangar.
Our laminated posts and trusses are manufactured in-house, which gives us control over quality and alignment. Careful engineering and clean installation practices help the hangar stay straight and operate smoothly through Prairie winters. This supports practical outcomes such as consistent tow lines, reliable equipment doors, controlled airflow, and tidy storage that keeps wingtips away from clutter.
Remuda builds aircraft hangars throughout British Columbia, Alberta, and Saskatchewan and offers aircraft owners the clear communication, organized sites, and realistic sequencing from groundwork through final adjustments that they value. Remuda’s personal, high-touch process supports the confidence you want in a hangar that protects your aircraft and fits your routine.
To discuss layout, features, and timing that match how you fly and maintain your aircraft, talk to a Building Consultant.
Common Questions
Aircraft hangar builders who understand rural properties will start with a site visit, ask how you tow, and look at wind and snow exposure around the apron. Remuda Building designs and constructs custom post frame aircraft hangars across Alberta, Saskatchewan, and British Columbia with engineering that reflects local soils and weather loads. We prepare clear drawings, coordinate equipment door requirements, and plan details such as building wrap and interior metal cladding so the hangar is clean, durable, and practical to maintain. A conversation with a Building Consultant will confirm if your site and goals are the right fit.
Begin with aircraft dimensions and how you move around the apron on a typical day.
Size the equipment door to exceed your wingspan with a buffer at each tip, and set ceiling height to give clean tail clearance with room for lighting and heaters. Plan a straight taxi line, then zone benches, tools, and storage along the sides. Add ventilation, lighting, and outlets to support winter maintenance. Confirm setbacks and gather engineered drawings before concrete work begins.
A kit can work for owners who have time, tools, and trusted local trades. Most rural aircraft owners prefer a complete build because the structure, equipment door, and engineering come together as one coordinated process based on unique needs. If you are considering a kit, confirm what is included, how stamped drawings are provided, and how the equipment door will be supported. Plan for insulation, ventilation, and interior metal cladding even if the package includes only exterior cladding. Delivery, unloading, and local service for door hardware should be arranged before materials arrive.
A practical starting point for many single-engine aircraft is a footprint around 40’ x 40’ x 12’ to 14’. Adjustments depend on wingspan, tail height, and the equipment door you choose. If you want bench space, a parts room, a wash zone, or have multiple aircraft, extend width or depth so towing stays clear. For two aircraft, 40’ x 60’ x 16’ is common and supports a small mezzanine above for an office or storage area. The best size fits the aircraft you fly most often and how you prefer to store your gear.
Bi-fold doors create full width openings and strong headroom near the centreline, which helps with tall tails and wide wings. Sliding doors are simple to service, dependable in rural settings, and stay reliable when tracks are kept straight and clean. Choose based on door width, wind exposure, and how you want to maintain the hardware.